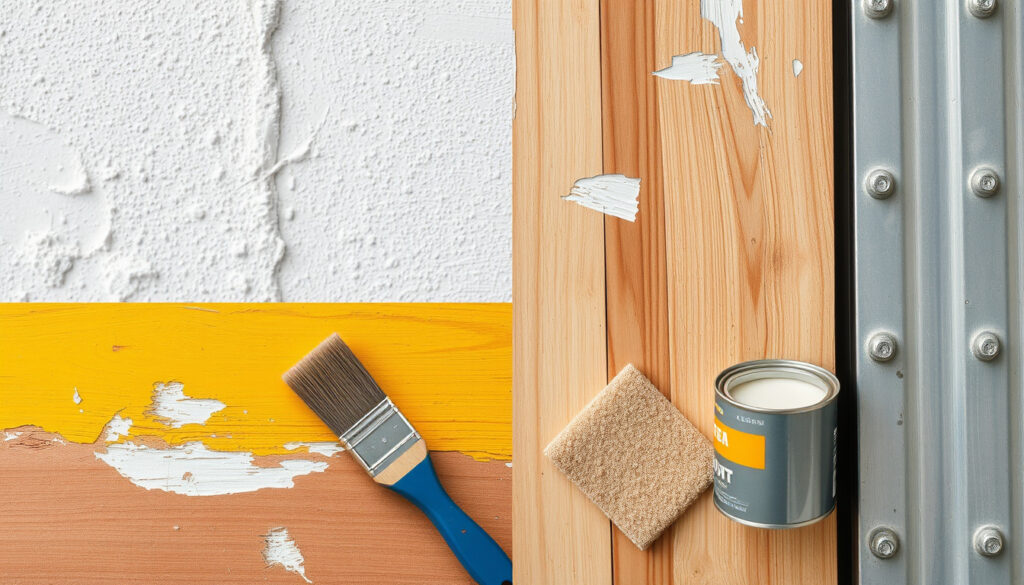
How to Repair Chipped Paint: Wall, Car, Wood & Metal Guide
It happens to almost every homeowner: you bump into a corner or drag a chair across the room, and suddenly there’s a bare spot on the wall. That chipped paint is more than an eyesore—if left alone, moisture and dirt can worsen it. Whether it’s a wall, a car door, a wooden chair, or a metal railing, repairing chipped paint is a skill that saves money and preserves surfaces.
DIY chip repair cost vs. professional: $10–30 vs. $150–500 per panel ·
Wall chip repair steps: 4 (scrape, fill, sand, paint) ·
Stone chip diameter (car): 0.5–2 mm ·
Spackle drying time (thin layer): 2 hours ·
Surface area of typical wall chip: 0.5–2 cm²
Quick snapshot
- Materials: spackle, putty knife, sandpaper, paint (The Home Depot)
- Steps: scrape, fill, sand, prime, paint (The Home Depot)
- Best for: small to medium chips on drywall (The Home Depot)
- Materials: touch-up paint, primer, clear coat, fine sandpaper (Elite Window Tint)
- Steps: clean, sand, apply primer, paint, blend (Elite Window Tint)
- Best for: stone chips and scratches (Elite Window Tint)
- Materials: wood filler, epoxy, sandpaper, paint or stain (The Craftsman Blog)
- Steps: clean, fill, sand, prime, paint (The Craftsman Blog)
- Best for: doors, furniture, trim (The Craftsman Blog)
- Materials: rust-inhibitive primer, metal paint, sandpaper
- Steps: sand, clean, prime, paint, seal
- Best for: metal doors, railings, appliances
Five key facts about chip repair, one takeaway: all surfaces benefit from proper prep—skipping it leads to peeling and wasted effort.
Cost and time data for chipped paint repair varies by surface and severity.
| Fact | Value |
|---|---|
| Typical chip size on cars | 0.5–2 mm diameter (Elite Window Tint) |
| DIY wall chip repair time | 1–3 days (including drying time, per The Home Depot) |
| Professional chip repair cost per panel (car) | $150–500 (Apex Auto Pros) |
| Painting over a chip without prep | Generally not recommended; paint will peel (The Craftsman Blog) |
| Common cause of chips on walls | Impact or moisture damage |
The pattern: cost rises faster than chip size—a tiny wall chip costs $10 to fix at home, but a neglected car chip can hit $500.
Can Chipped Paint Be Repaired?
Yes, chipped paint can typically be repaired on walls, cars, wood, and metal. The success of a repair depends on two factors: proper surface preparation and matching the paint type.
Overview of repairability by surface type
- Walls: Drywall chips respond well to spackle or joint compound. A thin-layer approach—apply, let dry, sand, repeat—produces a flush finish (The Home Depot).
- Cars: Small stone chips can be repaired with a touch-up kit, typically costing $15–70. The key is to clean, sand, and apply paint in thin layers (Elite Window Tint).
- Wood: Scrape loose paint, fill with wood filler, sand, and repaint. Overfilling slightly allows you to sand back to level (The Craftsman Blog).
- Metal: Rust must be removed first, then apply a rust-inhibitive primer before painting.
The implication: surface-specific prep determines repair longevity—wall spackle fails on car metal, and wood filler cracks on drywall.
Time is the real cost. A rushed wall repair peels in months, while a careful job lasts years. Investing patience now saves repainting later.
How Do Professionals Fix Paint Chips?
Professionals bring specialized tools, color matching, and blending techniques that DIY kits can’t replicate.
Tools and materials used by pros
- Sandpaper in multiple grits (800, 1000, 1500, 2500) to level and blend (YouTube car-repair guide)
- Primer-filler or UV-cured putty to fill chips (YouTube tutorial)
- Color-matched paint from the manufacturer’s code (e.g., Ford’s “Oxford White”)
- Clear coat and polishing compound for a gloss finish
Step-by-step professional method
- Degrease the panel and feather the chip edges.
- Apply filler (spackle for walls, putty for cars) in thin layers, letting each dry.
- Sand with progressively finer grits.
- Primer the area, then apply two coats of base paint, followed by clear coat (YouTube tutorial).
- Buff and polish to match the surrounding finish.
Professionals spend 60–90 minutes on a single car chip and achieve a nearly invisible repair (YouTube time estimate). For walls, the same principle applies—multiple thin layers are the secret to a flat surface.
A chip that costs $30–60 to repair today can become a rust problem costing $500–1,000+ later (Elite Window Tint).
The catch: pro-level blending requires skill and specialized tools—DIY kits save money but may leave a visible edge.
What Is the Best Filler for Chipped Paint?
The right filler depends on the surface: walls need spackle, cars need automotive primer-filler, and wood needs wood filler or epoxy.
Filler for walls vs. car vs. wood
- Walls: Spackle or joint compound. Spackle dries faster and shrinks less (The Home Depot).
- Cars: Touch-up paint systems often include a primer-filler. UV putty is also used for larger chips (YouTube tutorial).
- Wood: Wood filler (or epoxy for deeper damage) – overfill and sand flush (The Craftsman Blog).
Application tips for filler
- Apply thin layers – thick blobs crack.
- Let each layer dry completely (24 hours for spackle, a few minutes for UV putty).
- Sand with fine grit (180–220 for walls, 800–2500 for cars).
- Prime before painting to ensure adhesion.
What this means: matching filler to surface prevents cracking and peeling—spackle on car metal fails, wood filler on drywall crumbles.
Can You Fix Paint Chips Yourself? (DIY Methods)
Yes, DIY repair is possible with basic tools. The process varies by surface, but the core steps remain: clean, sand, fill, prime, paint.
DIY wall chip repair
- Scrape loose paint with a putty knife.
- Lightly sand the area (180–220 grit) to feather the edges.
- Apply spackle in thin layers, letting each dry 24 hours (The Home Depot).
- Sand smooth, prime, and repaint.
DIY car chip repair
- Clean and degrease the area.
- Sand the chip with 800-grit sandpaper on a block to keep it flat.
- Apply touch-up paint in thin coats, allowing each to dry.
- Step up to 1000, 1500, then 2500 grit, then buff (YouTube guide).
DIY wood chip repair
- Scrape loose paint back to a solid edge.
- Fill with wood filler, overfilling slightly.
- Sand flush after the filler dries (a few minutes to an hour).
- Prime and paint (The Craftsman Blog).
DIY repair costs $10–30 in materials; professional repair runs $150–500 per panel. For a single chip, a homeowner can save hundreds by spending an afternoon prepping and painting correctly.
The pattern: each surface follows the same sequence—clean, sand, fill, prime, paint—but material substitutions matter.
How to Repair Chipped Paint Without Sanding?
Some fillers can be applied without sanding if the chip edge is already smooth, but this is risky.
Sanding alternatives
- Use a sanding sponge for tight corners.
- Apply a bonding primer before painting to help adhesion.
- For very small chips, paint alone may hide the flaw temporarily.
Products that skip sanding
- Self-leveling fillers (thin enough to feather without sanding).
- Paintable caulk for small cracks.
- Touch-up pens for car chips (they fill the crater with paint only).
The catch: skipping sanding often leads to poor adhesion and a visible line. For a permanent fix, sanding is required.
What About Chipped Paint on Cars? (Large Chips & Scratches)
Large chips and scratches on a car require different handling than pinpoint stone chips.
How to fix large paint chips on car
- DIY kit with primer-filler can handle chips up to 5 mm.
- Larger chips may need a professional respray ($150–400 per panel, per Apex Auto Pros).
- If rust has formed, sand down to bare metal and apply rust converter.
Does T-Cut work on scratches?
T-Cut (cutting compound) removes light scratches by abrading the clear coat. It does not fill chips—for deep damage, use touch-up paint first, then polish.
The implication: a large car chip left untreated can escalate from a $70 DIY fix to a $400 professional respray—rust accelerates the cost.
Step-by-Step Guide to Repairing Chipped Paint
This universal method works on walls, cars, wood, and metal with material-specific substitutions.
- Prepare the area: Protect surrounding surfaces with painter’s tape. Remove loose paint with a scraper.
- Clean: Wash the chip and surrounding area with soap and water. Degrease if necessary.
- Sand the edges: Use 180–220 grit for walls, 800 for cars. Feather the edges to blend.
- Fill the chip: Apply appropriate filler in thin layers. Let each layer dry completely.
- Sand the filler: Sand flush with the surrounding surface using fine grit.
- Prime: Apply a primer that matches the surface (rust-inhibitive for metal, wood primer for wood, etc.).
- Paint: Apply two thin coats of matching paint, waiting for each to dry. Add clear coat for cars.
- Finish: Buff and polish for a seamless look (optional for walls, recommended for cars).
DIY repair costs $10–30 in materials; professional repair runs $150–500 per panel. For a single chip, DIY wins. For a door full of chips, pro is cheaper in time and quality.
What this means: eight steps apply across surfaces, but substituting the wrong filler turns a 30-minute fix into a weekend redo.
What We Know and What’s Still Unclear
Confirmed facts
- Spackle works for wall chips (The Home Depot).
- Automotive touch-up paint can fix small car chips (Elite Window Tint).
- DIY repair costs less than professional (Apex Auto Pros).
What’s unclear
- Long-term durability of DIY vs professional repairs—no long-term studies exist.
- Effectiveness of “no sand” products compared to traditional sanding methods.
Expert Perspectives on Paint Chip Repair
“For wall patches, apply thin layers of spackle and let each layer dry 24 hours. Rushing the drying time is the number one mistake homeowners make.”
— Product manager at The Home Depot (home improvement retailer)
“For car touch-ups, clean and degrease the panel first. Then apply primer-filler, two coats of paint, and two coats of clear coat with about five minutes between coats.”
— Automotive paint repair tutorial (YouTube)
“Overfill the chip slightly on wood surfaces so you can sand back to level. A small patch may be ready to sand in a few minutes; larger ones may need an hour.”
— DIY furniture restorer at The Craftsman Blog
The implication: experts agree on the importance of patience—thin layers and full drying times separate a lasting fix from a temporary cover-up.
facebook.com, reddit.com, facebook.com, youtube.com, youtube.com, bmwi.bimmerpost.com
For a deeper look at techniques and products, check out this complete guide on repairing chipped paint on walls, cars, wood, and metal.
Frequently Asked Questions
Can I use nail polish to fix a car paint chip?
Nail polish lacks the UV resistance and flexibility of automotive paint. It may fill the chip temporarily but will soon chip or fade. Use a dedicated touch-up kit instead.
Is it worth fixing small paint chips on a rental property?
Yes. Small chips left untreated can lead to larger damage and deductions from your security deposit. DIY repair costs under $10 and takes an afternoon.
How long should I let spackle dry before sanding?
The Home Depot recommends 24 hours for wall patches, although thin layers may dry faster. Always follow the product label.
Can chipped paint lead to rust on a car?
Yes. A chip exposes bare metal to moisture. If left unrepaired, rust can form within weeks and spread under the paint, costing hundreds to fix later.
What is the difference between spackle and joint compound for chip repair?
Spackle dries faster, shrinks less, and is easier to sand. Joint compound is better for larger areas but requires multiple coats and longer drying times.
Do I need primer before painting over a chip?
Yes. Primer seals the filler, improves paint adhesion, and prevents the repaired area from flashing through the topcoat. Skipping primer often leads to peeling.
Can I fix a chip on a gloss-painted door without leaving a mark?
Yes, with careful sanding and gloss paint. Feather the edges, apply thin paint layers, and buff the final coat. A pro-level finish is achievable with patience.
For the homeowner facing a chip on a wall or door, the choice is clear: take the time to prep, fill, and sand properly, or accept a visible patch that may peel. For the car owner, a $30 DIY kit today beats a $1,000 respray tomorrow. That small investment in materials and patience prevents large expenses later.
More related posts
 Are Grapes Bad for Dogs – Toxicity Risks Symptoms Emergency Guide
 Gold Price in India Today: 22K & 24K Rate Per Gram, Tola, KG
 Fox News Live Stream Free: Best Options Without Cable
 Love Is Blind New Episodes: Season 10 Release Schedule
 Best Free Spanish to English Translator: Top Tools Compared
 Baltimore Ravens vs Cleveland Browns Match Player Stats 2025
 Oregon Ducks Football Schedule 2026-2027
 Discover High Yield Savings – Rates, Review and Comparison